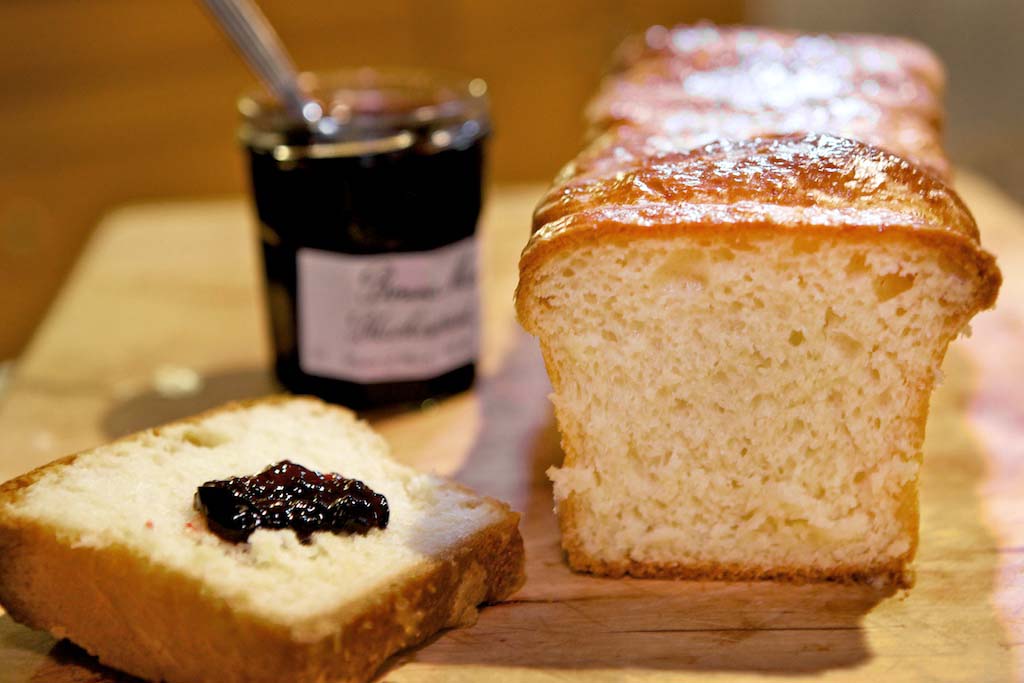
 My friend, Elaine – whose own oven yields magic at such a staggering and humiliating output, her kitchen could make Willie Wonka’s factory look as though it has gone dormant – not long ago gave me one of the nicest gifts I have ever received.
She came to work and placed in my hands – still warm from her oven — a loaf of homemade brioche. Now food as gift, to me, receives some of the highest marks on the scorecard. Freshly baked bread given to me, hot out of the chute, will make you my blood brother. I carried the loaf in its paper sack, seething with the butter soaking through it, to my office. In those few steps, I was overcome by the intoxicating aroma of butter and yeast, the heat in my hands. I was succumbing to something primitive. By the time I had reached my desk, I’d ripped the end off the bread and was devouring it like some kind of wild animal.
It was fantastic – a yeasty loaf, tenderly crusted, dense yet delicately textured, egg-y and buttery and rich, it came apart in conveniently mouthwatering segments (as I learned brioche loaves do). I could have eaten the whole thing right there…but I resisted. And I vowed I must make brioche myself.
I asked Elaine for the recipe, and here’s what happens when you are lucky enough to be a part of the Sisterhood of the Traveling Brioche – she brought me the entire cookbook from which the recipe came! See how lucky I am?
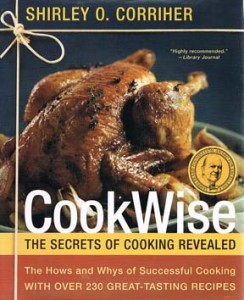 The book is “CookWise: The Secrets of Cooking Revealed
†by Shirley Corriher. If you are unfamiliar with Corriher by name (as I was), you might recognize her as the food scientist to whom Alton Brown defers on his popular Food Network show “Good Eats.†Clearly, this woman knows both the chemistry and magic (well, chemistry is magic) behind cooking and baking. The book is huge, but thankfully, my friend had placed a ribbon marker on the very page on which I planned to zero in. Brioche, brioche…I was a little in love – with a bread! And this, a year of monthly breads on A Woman Sconed!! Clearly, this beauty would be first on my list.
Brioche (pronounced bree-ohsh) is a French creation, and after noodling around, looking at various dictionary interpretations of the name, its meaning can be considered either “to knead†or “to break into pieces.†The bread is baked either as a loaf (assembled by the aforementioned pieces) or as rolls with little knobs on top fashioned in small scalloped, tart-like pans. From what I’ve read, brioche dough has been used in any number of sweet or savory creations, everything from sticky buns to beef en croute (beef encased in brioche)
From what I read of Corriher’s recipe and what Elaine told me, brioche was a tricky, challenging, labor-intensive, but completely gratifying bread project. I thought of the words of food writer MFK Fisher, who gave me inspiration on “how to rise up like new bread,†this year, writing about baking bread in “How to Cook a Wolfâ€:
“It does not cost much. It is pleasant; one of those almost hypnotic businesses, like a dance from some ancient ceremony. It leaves you filled with peace, and the house filled with one of the world’s sweetest smells. But it takes a lot of time. If you can find that, the rest is easy. And if you cannot rightly find it, make it, for probably there is no chiropractic treatment, no Yoga exercise, no hour of meditation in a music-throbbing chapel, that will leave you emptier of bad thoughts than this homely ceremony of making bread.â€
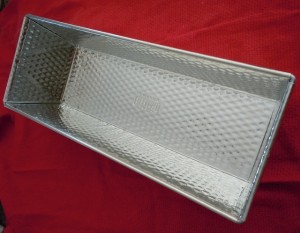 My first preparation to make the brioche was that I decided to get the proper pan advised by Corriher, a long loaf pan, 12 by 4 inches (also known as a “Pullmanâ€) with a shiny surface that Corriher said was best to ensure even browning. She recommended one made by Kaiser Bakeware, which I found through Amazon
 .
To give you an overview of my brioche making, I’d like you to know that I spent two successive weekends this month in brioche land. I made the recipe twice, because my first foray into the endeavor landed me less than satisfactory results (partly my fault). I did make some of my own adjustments to the recipe (both times, the second more successfully), which I will discuss here and also in my blogger’s notes following the recipe below.
Usually, the first time with a recipe will school you a lot. While I’m a big believer in following recipes to the teaspoon, I think what I learned from my first weekend of making brioche is that you should most certainly follow a recipe, but also know when to follow your own instincts and depart from a set of instructions. Everyone has a different kitchen, a different oven and different supplies and tools at his or her disposal – you do the best you can with what you have. Adaptation is a necessary means for survival.
 This dough begins as many do, by “proofing†the yeast — combining the yeast with warm water and sugar to see if it foams and is alive and ready for action. Next part of the flour, more sugar and egg whites (most yeast breads are egg-less, but brioche is known for its egg and butter aspects) are mixed in. The dough rests, then more flour, crushed ice, egg yolks and salt are added.
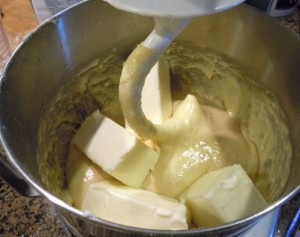 Then comes one more mixing of ONE POUND of softened butter. Thankfully, a Kitchen Aid stand mixer and a dough hook not only do the work of mixing in all the ingredients well, but kneading the dough. I am a squeamish kneader, the child of a woman who could knead bread with such force the heavy pullout cutting board of my family kitchen would bounce and bend under her near-brutish enthusiasm. I will tackle “real†kneading in further bread projects, but here, for now, the machine will be the muscle.
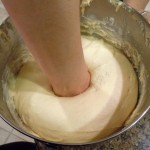 The dough rises at room temperature, then in the refrigerator, then the beautiful moment of punching it down, where I used all my prize-fighter wannabe strength and was promptly swallowed by the mass. Took a little work to get out of its clutches. It’s supposed to be a sticky dough. At this point – on both occasions I made the bread – I took the option of leaving it in the fridge overnight. As I put that first bowl of dough into the cooler, I was a bit staggered by the extent of this recipe, which seemed to have more steps to it than the mambo I had been learning in Zumba class that morning. Still, the memory of the smell and taste of Elaine’s bread lingered heavily. It would be worth it.
When I removed the bread from the fridge to shape it, I was stunned that it had actually risen in the cold temperatures. I touched the surface of the bread and it went, “haaah,†as if someone were about to clean his spectacles. It was alive! Upon shaping the bread, a couple of things gave me pause that perhaps both the recipe and I were amiss. I found there were clumps of butter in the dough, as if I had not mixed it well enough. I was not too concerned that it would be a problem, however. The second issue was that, despite using one long loaf pan, I really, really had to cram all the segments of dough to make them fit – before rising. My thought was that you could easily make two 8-inch loaves out of this recipe (which Elaine did, I believe).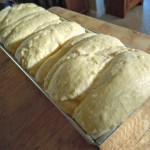
I let that first loaf raise…it lifted up voluminously. Here I must admit that, since I did not have a baking stone, I used Corriher’s method of using a baking sheet and a pan of hot water for the baking process. I was confident in the recipe and let out a sigh like my dough had that morning as I slipped it into the oven.
AWS could tell you that everything went fine and dandy. I’m a food blogger, and I’m supposed to have a great interest and mild expertise in the subjects of cooking and baking. Well, I’m going to be transparent here (as elsewhere) and admit to my failings — this loaf of brioche was less than satisfactory only because it was baked improperly. The smell of it baking drove me wild with anticipation and salivation, but as I watched it bake, I noticed the ends of the loaf poufed up and over the edge of that long-assed pan. Not to worry, I thought. The surface of the loaf got very, very brown, so I yanked it from the heat when the end of the recipe’s given baking time was up. Done, I thought. Wrong. The center of the loaf, directly above that pan of boiling water in the bottom of the oven, was about half as done as the rest of the loaf, which, by the way, actually tasted delicious, giving the promise of what would have been.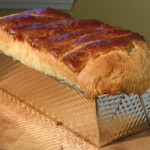
The old me would have freaked out, thrown her brioche pan across the room. I was strangely calm and merely mulling over what went wrong and how I could amend it next time. Next time? Of course, I would do it again.
I decided to buy a baking stone, a large 15 by 16-inch version. I had a feeling it would be useful and used often. I decided to rebel against Corriher’s use of boiling water underneath the bread. My oven is my oven, and that just didn’t work right in my case. I also decided to spend more time working the butter into the dough on that second turn at the wheel and noticed the dough didn’t puff up as much or say “haah†after a night in the refrigerator. I took this to be a good sign.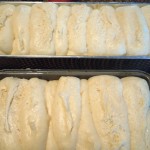 And, I made two loaves (strangely enough, Corriher’s recipe for the most part indicates that you are making one loaf, but in Step 6, mentions placing “loaves†in the oven – maybe an error, maybe a suggestion?) this time – an 8 by 5-inch loaf and the 12 by 4-inch loaf pan. Both filled up beautifully. I do believe you might be able to get any number of loaves out of this recipe, almost biblically.
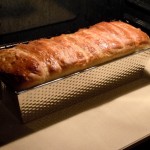 I had a much better result the second time. The loaves baked evenly and beautifully, and tasted almost as good as Elaine’s, which for me, was very satisfying. To describe the taste of this brioche, I’d say this: If a buttery biscuit and an airy yeast bread had a love child, and that child was air-kissed by a pound cake third cousin, then that child might be a brioche. Delightful.
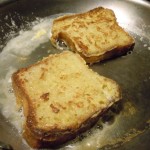 if the bread alone was not rich enough (you don’t need butter for this one, folks), I took a few slices and made French toast out of it later in the week! I toasted the brioche first to get it ready for its bath in a batter of a couple of eggs, some half and half, a packet of Stevia, orange zest, cinnamon, a little vanilla and a dash of salt. It turned it into a slightly different species, but one no less delicious, extending the life of an already lengthy loaf and a precious gift.
The Ultimate Brioche
Light, Airy Breadlike Brioche
From “CookWise: The Secrets of Cooking Revealedâ€
by Shirley Corriher (1997)
Makes One 4 x 12-inch loaf
What this recipe shows:
Mixing and kneading liquid and flour produce elastic sheets of gluten that remain intact when butter is added later, producing a light, well-leavened loaf.
Chilling a very rich dough before punching down makes it possible to work with the dough without losing the butter.
Baking in a long, narrow, shiny pan keeps this rich bread from burning before the center is done.
1 cup warm water (115F/46C)
1 teaspoon and ¼ cup sugar (1/4 cup plus 1 teaspoon total)
1 tablespoon (1 1/3 packages) active dry yeast
4 large egg whites
2 cups and 2 ¼ cups bread flour (4 ¼ cups total)
¼ cup crushed ice
5 large egg yolks
1 ¾ teaspoons salt
Water as needed
1 pound (4 sticks) butter, softened
Nonstick cooking spray
1 egg, beaten, for glaze
1. Stir together the warm water, 1 teaspoon sugar, and the yeast in the bowl of a heavy-duty mixer. Let stand 2 minutes until foam appears, indicating yeast is alive and well. Add ¼ cup sugar, the egg whites and 2 cups flour. With the paddle blade, beat on low-medium speed for 4 minutes to incorporate air. Let stand for 30 minutes to 2 ½ hours for improved flaor and texture.
2. Add the crushed ice, egg yolks, remaining 2 ¼ cups flour, and salt. Remove the paddle blade, insert the dough hook, and knead for 5 minutes on low-medium speed until you have a very elastic, sticky dough. Dough should be wet enough to stick to the bowl. Add more water if necessary and mix in well.
3. Let the dough rise for 10 minutes, then mix in softened butter on low speed. Scrape down the sides and incorporate as much butter as possible. Mix again on low. There is so much butter the dough will be a stringy mess.
4. Cover and let the dough rise at room temperature for 30 minutes, then refrigerate for 45 minutes. Dough must be cold before you punch it down. Punch down the dough. The dough can be refrigerated overnight at this point if desired. When ready to shape, with both hands gently cup and tuck the dough into a smooth round. Cover with plastic wrap and leave on the counter for 10 minutes.
5. Spray one 4 x 12 x 2 ¾ -inch pan (see Notes) with nonstick cooking spray. Divide the dough in 10 pieces and shape into cylinders 3 ½ to 4 inchs long, about the width of the pan. Arrange the 10 cylinders in a row down the pan, pressing one against the other. Brush the dough with beaten egg (try not to get egg on the pan) and let bread rise in a warm room until slightly above the pan. This will take about 2 hours, depending on how cold the dough was.
6. About 30 minutes before the dough is fully risen, place a baking stone on the lowest oven shelf and preheat to 450 F – see Notes. About 5 minutes before the bread is fully risen, turn the oven down to 375 F. A few minutes before placing te loaves in the oven, carefully arrange a shallow baking pan with ½ inch boiling water on the floor of the oven. (For an electric oven, put the pan of water on the lowest possible shelf.)
7. Brush the loaf with beaten agg again and place the pans directly on the hot stone. Bake until very brown, about 40 minutes. Loaves get a deep brown because of their egg and sugar content. Remove a loaf from the pan and check for doneness by inserting an instant-read thermometer in the bottom center of the loaf to the estimated middle. The loaf is done whten the center is about 200 F. Let the loaves cool in the pan for 5 minues., then turn out on a rack to finish cooling.
Notes: If you don’t have a stone:
Preheat the oven to 25 degrees below the baking temperature. Carefully place a shallow pan with ¼ inch of boiling water on the oven floor. (For an electric oven, put the pan of water on the lowest possible shelf.) Place the bread on a shelf in the lower third of the oven, 5 to 6 inches above the bottom, and then turn the oven up to the baking temperature.
Blogger’s Notes: In Step 1, I used just one packet of yeast and I used all five egg whites separated from the five yolks.
In Step 5, I divided the dough into about 16 pieces, filling an 8 by 5-inch loaf pan with 6 or 7 cylinders of dough and a 12 by 4-inch pan with 9 to 10 cylinders of dough.
In Steps 6 and 7, I used a baking stone on the lowest level of the oven and no boiling water for the baking process. About 7 to 10 minutes before the baking time was up, I used a loose tent of foil atop the bread to keep it from overbrowning. I did not use a thermometer to test the doneness of the bread, but rapped the bread’s top – as I had seen my mother do many times, to hear the hollow sound of a finished loaf. I also checked the bottom of the loaf to see if it had browned evenly.